| Navigation: | Home | Other Things | Scratch Building Howe Truss Bridges |
 |
Scratch Building Howe Truss Bridges |
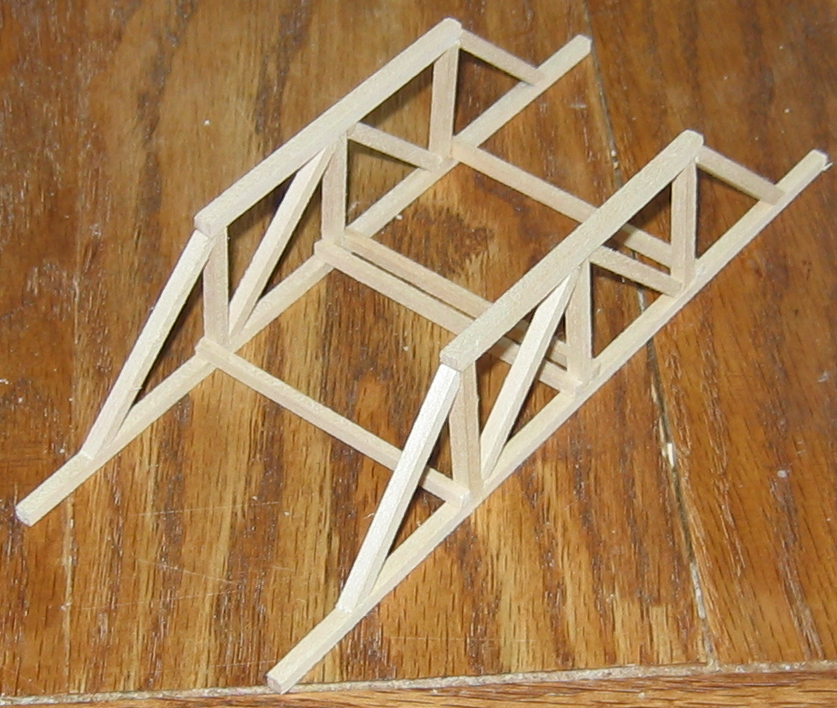
The plans for the B&CC's predecessor (my first basement layout) included four wooden truss bridges. After much searching for kits that looked good, I decided to try my hand at scratch building with the "Truss Bridge Kit" in HO scale available from Black Bear Construction Company.
This kit comes in different forms:

The jig (click on the thumbnail for a full sized picture) is made out of acrylic, so using a cyanoacrylate adhesive (Superglue) is not a good idea. Plain old white glue works just fine. The open ends of the jig allow for modular building of larger bridges. Further, the jig also supports constructing pier braces. These also double for spacing track stringers on the bridge bed itself (both standard and narrow guage spacing is covered). In addition, the jig comes with two pages of plans that aid with spacing of deck beams as well as the different possible tension rod arrangements.
Before beginning assembly, you need to know how long the bridge will be. Further, you will want to weather the wood before or after bridge construction. I've used a variety of methods and my preference is currently either A-West's Weather-It for Wood and Plaster or a mixture of India ink and rubbing alcohol.
Directions for construction are reasonably clear and the following review presents a condensed version so that readers can judge the complexity for themselves. Building a bridge consists of first building the side plates then adding floor beams, details and stringers.

For spacing and alignment of the side panels, one can either use a page of graph paper or build a jig out
of legos. Floor beams are cut from 8"x12" stock and the first two go outside the end-most vertical posts.
Since these hold the diagonal tension rods, holes should be drilled at a 45 degree angle (a pin vise works
best for this). After gluing these two beams in place, set the assembly aside to dry thoroughly. Once dry,
the other beams that are next to the vertical posts are added and once again, the assembly is allowed to dry
thoroughly. This ensures enough strength for handling during the remaining steps.
Next, notch and add the floor beams that fit next to the diagonal braces. Space the remaining full length floor beams evenly (the short beams that go between the vertical posts of the side panel will be added a later). A scrap piece of (tbd) works well as a spacer. At this point, trim the bottom chords of the side panels to the bridge's final length (be sure to leave room for support for the bridge).
Detailing starts with two additional bottom chords are cut from 12"x12" stock and glued to the underside of the bridge, using the pier jig to space these chords correctly - under the stringers that will hold the rails and ties. Cut diagonal stops from 6"x12" stock and glued to the bottom chords. Notch both ends of the floor beams that rest on these stops and glued over the top of the stops. Each of the bottom chords on the underside of the bridge also have an 8"x12" 'shoe' glued in place. These shoes have a 30 degree angle cut on the inside edge of them. Add the short floor beams that go between the vertical posts and cut and glue the last wooden pieces (the two 8"x8" stringers for the rails and ties) on top of the bridge, using the bottom chords as spacing guides.
Use a pin vise and small drill bit to drill holes for the tension rods and NBWs. Slide the rod through these holes and glue into the bottom holes, then glue the covering NBW in place. Instead of painting the NBWs and tension rods before construction, painting afterwards allows rust stains on the wood surfaces around the rods and NBWs to be modeled. Floquil's rust paint (from Testors) and a 3/0 brush works well.
The following four bridges show examples of the possibilities of this jig:
 30' Queen's Post truss bridge |
 50' bridge |
 70' bridge |
 80' bridge |